In iOS 5 we got GLKit, which added a lot of higher-level functionality missing from OpenGL ES. It notably does not include object loading or scene graph management, two of the most fundamental needs of 3D programs.
Then, in one of the early Mountain Lion previews, something called SceneKit showed up. I'd been hearing bits and pieces about SceneKit before it was released, but had honestly assumed it was going to show up on iOS. The documentation for SceneKit was (and still is) pretty sparse, but the functionality looks really promising.
Unfortunately, as of right now, SceneKit is a Mac-only technology. I've seen been no evidence yet that SceneKit will be included in iOS 6. It's still possible, but I'm not holding my breath. If not, well… fingers crossed for iOS 7.
Even as a Mac-only technology, SceneKit is a very cool framework. Let's take a look at what it does and how it works.
SceneKit, Conceptually
Before we start using SceneKit, let's talk a little about what SceneKit is and does. Conceptually speaking, SceneKit sits above OpenGL, but below the higher level frameworks like AppKit. SceneKit views are fully layer-aware, so the view can be animated using Core Animation. Not only can the view itself be animated using Core Animation, you can actually use Core Animation to animate the contents of the view.SceneKit is primarily what's known as a scene graph management library. It manages one or more 3D objects plus lights and camera. These items together, comprise a "scene" that can be manipulated and displayed on screen. Although, some understanding of graphics programming is beneficial when using SceneKit, it has a much smaller learning curve and, by using a paradigm that's familiar to most people (a movie-set like scene with a camera, lights, and objects), it's conceptually much easier.
SceneKit provides some functionality for creating scenes from scratch right in your code, but is primarily designed for working with 3D scene data exported from an external application like Maya, 3DS Max, Modo, LightWave, or Blender. SceneKit uses the Collada file format, which is supported by most (if not all) major 3D programs (though with some caveats I'll discuss later). The Collada file format doesn't support just 3D objects, it can store information about an entire 3D scene including lights and cameras as well as armatures and animation data for both simple object animation and complex skeletal animation.
SceneKit is very well integrated with AppKit. As you'll see a little later, projection (how you determine if a mouse click or tap touches a 3D object in your scene) is actually handled using the standard hit testing mechanism that's already in NSView.
SceneKit is perfectly capable of rendering most scenes for you without any need to interact with the OpenGL API or write shader code. If you need more flexibility, however, SceneKit also offers the ability to let you render the scene, or any individual component of the scene, using a render delegate. This lets you get up and running fast, but also gives you the full flexibility of OpenGL should you need it. Render delegates are beyond the scope of this introductory article, but the very presence of such a mechanism shows how much thought went into the engineering of this framework.
The bottom line is that SceneKit, makes a lot of hard things really easy. But, there are a lot of undocumented nooks and crannies in SceneKit right now. I'll look at a few of those today and hopefully get you to a place where you can start exploring the rest of them.
Setup to Play Along at Home
If you want to use SceneKit, you're going to need to be using Xcode 4.4 or 4.5 and, of course, you need to be on Mountain Lion. If you feel like playing along at home, go ahead and open up Xcode. If you'd rather just download the code, you can get it right here. If you're not going to play along at home, feel free to skip ahead to the section called Setting the Scene Background Color.In Xcode, create a new OS X Application project in Xcode by pressing ⌘⇧N and selecting the Cocoa Application project template.
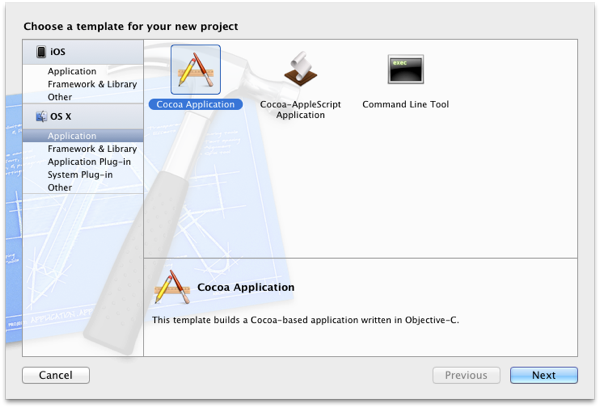
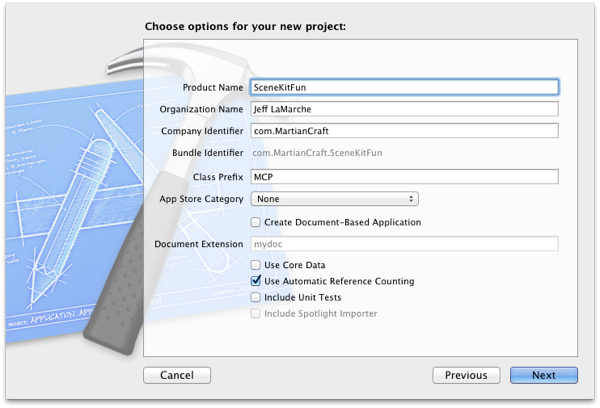
You can call your project whatever you want. I'm calling mine SceneKitFun to keep with the naming convention I started in Beginning iPhone Development. The only setting that matters here is making sure Use Automatic Reference Counting is checked. All the code I post here will be using ARC. I'm using the prefix MCP in my code, which is our internal MartianCraft class prefix. If you use a different prefix (and you should), your filenames will be slightly different than mine.
After your project has been created, add the SceneKit framework to your project. SceneKit is not included in Xcode projects by default, and we need to use its functionality. You'll also need to add the QuartzCore framework, as SceneKit relies on several Core Animation data structures and macros.
Wiring up the Scene View
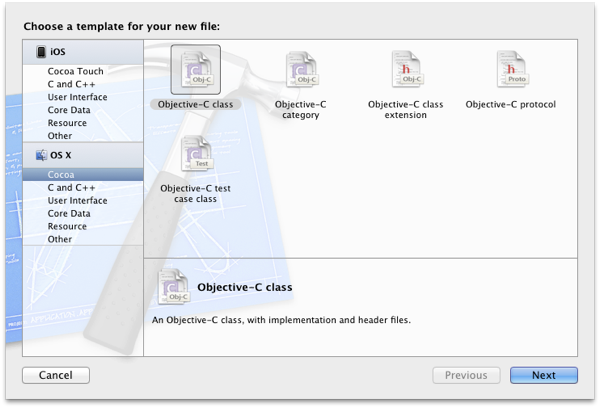
Now, we need to create a SceneKit view. SCNView, the class that implements a SceneKit view does not have a delegate, so to add our custom functionality, we're going to subclass SCNView. Alternatively, we could use a stock SCNView and set its properties from another class, such as our app delegate, but I find my code tends to be cleaner with subclassing in cases like this.Create a new class in your project. You want to use the OS X Cocoa template called Objective-C Class.
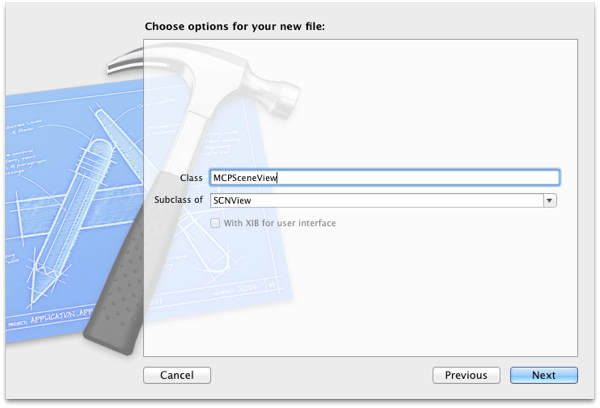
Call the class XXXSceneView (where XXX is the three letter prefix you want to use), and make it a subclass of SCNView.
Next, click MainMenu.xib to open Xcode's interface builder. From the Object Library in the lower right pane (press ^⌥⌘3 to bring it up if you don't see it), Drag a Scene View object to your application's window, then resize it to take up the full window. Xcode's auto-constraints should do the right thing automatically and make the new view resize with the window, so we shouldn't need to do anything else in terms of layout.
Press ⌥⌘3 to bring up the Identity Inspector and set the class of this new view to XXXSceneView.
Single-click XXXSceneView.h to open the header up in the editor. Right now, our code won't compile because the compiler won't know where to find SCNView. Insert the following #import statement right after the existing import to tell it:
Now you can compile your app. It won't do much, but it will compile and run and show you an all-white window.
Setting the Scene Background Color
Let's make sure everything is wired up correctly. We can do that by implementing awakeFromNib in our scene view class and setting the scene's backgroundColor property. Setting this is exactly the same as clearing the framebuffer to a specific color in OpenGL. It will change the color of the view "behind" the objects in the scene. Essentially, this will the set the color everywhere in the view where there's no 3D object visible. Since we haven't given the view a scene to display, this will change the entire view to that color for now. This will tell us if we have everything set up correctly. If we set the background color and the window is still white, we know something's gone awry.In XXXSceneView.m, add the following method after the @implementation line to set the view's color. I'm using a nice neutral gray, but you can use whatever color gives you a warm fuzzy.
-(void)awakeFromNib
If you run the app now and everything is wired up correctly, the app window should now be gray (or some other color) rather than white. If it is, we're ready to start building.
Building a Simple Scene
As I stated earlier, SceneKit is primarily designed for loading 3D scene data from other programs. It does have the ability to construct a scene programmatically, though. Let's construct a simple scene in code, which will introduce you to the basic tools and terminology of SceneKit.The most basic useful SceneKit scene consists of a camera, a light, and an object. Without those basic components, there's not really much to see. You need an object to look at, a camera to look with, and a light so the object can be seen.
We'll start out by creating an empty SCNScene object. Once we have that object, in order to add items to a scene, we simply create instances of something called a "node". A node, represented by the class SCNNode, is designed to hold the different types of objects that can go into a scene. Nodes are hierarchical, so every node can contain child nodes and can be added as a child of any other node.
Every scene has a root node, imaginatively called rootNode, which is where you add the top level items of your scene. By creating nodes, assigning a 3D object, light, or camera to that node, and then adding the node as a child of rootNode or one of rootNode's children, we add objects to our scene. That's pretty straightforward, right?
For our simple example, we just need to add the objects to the scene once. Once they're added, they'll stay in the scene until removed. That means we can go ahead and add the code to create the scene right to the awakeFromNib method, which will build our scene as soon as our nib is loaded.
Our first step is to create an empty scene and assign it to our view's scene property.
// Create an empty scene
SCNScene *scene = ;
self.scene = scene;Next, let's add a camera. We have to create the camera and set some properties on it, create a node to hold the camera, assign the camera to that node, and then add the node to the scene. That looks something like this:
// Create a camera
SCNCamera *camera = ;
camera.xFov = 45; // Degrees, not radians
camera.yFov = 45;
SCNNode *cameraNode = ;
cameraNode.camera = camera;
cameraNode.position = SCNVector3Make(0, 0, 30);
;I've given the camera a field of view of 45° in both directions. For a wide-angle effect, you could increase the field of view by providing a larger number. For a telephoto effect, you could decrease the values. Notice that the FOV values need to be specified in degrees rather than radians unlike most other things in SceneKit or GLKit. I've also assigned the camera node a position 30 units back from the origin, so when later I add an object at the origin, the object will be in front of the camera and, therefore, visible.
If you look at SCNCamera, you'll notice that its properties fairly closely mimic those that we'd use to set up OpenGL viewport. That's not a coincidence. A "camera" in SceneKit isn't all that much more than a GL viewport along with a position and transformation in 3D space. If the camera is at position {0,0,30}, for example, then every node in the scene will be shifted -30 along the Z axis before it is rendered to account for the camera's position. The camera can also be rotated, meaning we can move the camera around the virtual world very much like you could move a physical camera around the real world. Because of this, the scene will always be rendered from the perspective of the camera.
Once we have a camera, we need something for the camera to look at. Let's use one of the built-in primitives that SceneKit provides. SceneKit has built-in classes that represent a cylinder, cube, sphere, cone, capsule, plane, tube, torus, pyramid, and text. Each of these primitives is a subclass of the class SCNGeometry, which represents any kind of renderable object. Each of these items have different properties needed to instantiate them, but they all work fundamentally the same way. You create them, set any necessary properties, assign them to a node, and then add the node to the scene. Here's the basic process using a torus:
// Create a torus
SCNTorus *torus = ;
SCNNode *torusNode = ;
CATransform3D rot = CATransform3DMakeRotation(MCP_DEGREES_TO_RADIANS(45), 1, 0, 0);
torusNode.transform = rot;
;The only new thing here is that we've rotated the torus forty-five degrees along the X axis. We've done this by creating a CATransform3D and assigning it to the node's transform property. A CATransformCD is a 4x4 transformation matrix similar to GLKMatrix4. It can hold information about where an object is located in 3D space as well as how it's rotated, scaled, or otherwise transformed.
Now we have an object to look at, but we still need a light in order for it to draw correctly. If you run the program now, the torus will be drawn, but it will be drawn in a completely flat white, which is probably not the behavior you want.
As you might remember from my OpenGL ES From the Ground Up blog post on light, the most basic components of light in 3D graphics are the diffuse, ambient, and specular components. Here's the description of the various components of light from that post:
The following illustration shows what effect each component has on the resulting image.Source image from Wikimedia Commons, modified as allowed by license.
The specular component defines direct light that is very direct and focused and which tends to reflect back to the viewer such that it forms a "hot spot" or shine on the object. The size of the spot can vary based on a number of factors, but if you see an area of more pronounced light such as the two white dots on the yellow sphere above, that's generally going to be coming from the specular component of one or more lights.
The diffuse component defines flat, fairly even directional light that shines on the side of objects that faces the light source.
Ambient light is light with no apparent source. It is light that has bounced off of so many things that its original source can't be identified. The ambient component defines light that shines evenly off of all sides of all objects in the scene.

SceneKit's lighting options are considerably more advanced than what we were discussing in that blog post, but those descriptions are still fairly accurate. In SceneKit, specular highlights comes not from settings on the light, but rather from materials, which we'll look at later, but we can get the diffuse and ambient components just by adding some lights to our scene.
In SceneKit, lights can be one of several types. One type of light provides ambient light to the entire scene. Several other types can be used to provide different forms of direct light. These direct lights are used to calculate the diffuse and specular components of an object.
First, let's add a single ambient light to the scene by adding a light node set to be of the ambient type. Generally speaking, you should never have more than one ambient light node in a scene, though for more dramatic lighting effects, you might choose not to have an ambient light in your scene. The location and transformation of an ambient light doesn't matter because ambient light is applied evenly to all objects. Here's how we add an ambient light node:
// Create ambient light
SCNLight *ambientLight = ;
SCNNode *ambientLightNode = ;
ambientLight.type = SCNLightTypeAmbient;
ambientLight.color = ;
ambientLightNode.light = ambientLight;
;Next, we'll add a direct light node like so:
// Create a diffuse light
SCNLight *diffuseLight = ;
SCNNode *diffuseLightNode = ;
diffuseLight.type = SCNLightTypeOmni;
diffuseLightNode.light = diffuseLight;
diffuseLightNode.position = SCNVector3Make(-30, 30, 50);
;For our direct light, I've specified a type of SCNLightTypeOmni. This creates a light at a specific point in 3D space that shines out in all directions equally. Basically, it's like a bare light bulb floating somewhere in the scene. There are a couple other types we could have selected, including SCNLightTypeDirectional, which mimics a distant directional light source like the sun, and SCNLightTypeSpot which creates a light that shines in a specific direction from a specific point in space. Unlike ambient light, you often will want to add multiple direct lights to your scene to create different effects, though be aware that every light you add to the scene adds processing overhead.
At this point, we have a scene. It's nothing fancy, but it should look okay. Go ahead and run the app, and you should get something like this:
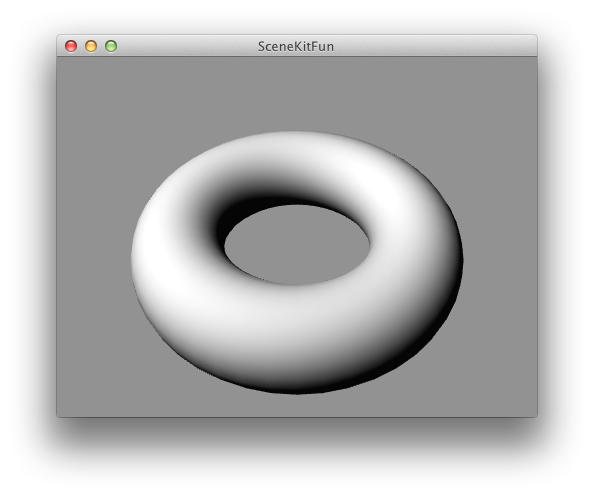
That's pretty good for about thirty lines of code, right? But there's so much more to SceneKit. Let's keep going.
Animating with Core Animation
A little later on, we'll look at using animations imported from a 3D program, but one thing that's really cool about SceneKit is that it's fully integrated with Core Animation. I'm not just talking about being able to animate the SceneKit view itself, but being able to actually animate the contents of the view. So, for example, we can rotate our torus just by creating a CAAnimation. Add the following code to your awakeFromNib method if you want to animate your torus.CAKeyframeAnimation *animation = ;
animation.values = ;
animation.duration = 3.f;
animation.repeatCount = HUGE_VALF;
;Yep, that's it. If you've ever worked with Core Animation, everything there should look pretty familiar. The only difference from what you'd be used to with Core Animation is that we're adding the animation to a node instead of to a layer.
Of course, you still have the option of setting up a CVDisplayLink or NSTimer and doing your animations manually if you're a glutton for punishment and want to risk not getting the full benefit of hardware acceleration. SceneKit doesn't take anything away, it just gives you easier ways to do stuff.
Scene Graph and Parenting
Earlier, I mentioned that SceneKit nodes can contain other nodes. This is actually a really powerful mechanism because children inherit there parent's position and transformations. If you move a node, all of its child nodes will move along with it. If the child was 5 units away before the move, it will be 5 units away after the move. If you rotate an object, all of its children will rotate also. But they won't rotate around their own centers, they'll rotate around their parents center.It probably makes sense to talk a little about "spaces" in graphics programming. Objects can be transformed in different "spaces". The two most common spaces are "local space" and "world space".
Normally, when you rotate an object, that object rotates around its own origin. We refer to this as an "object space" (or sometimes "local space") rotation. When we talk about "world space", we're talking about the actual position of the object in our 3D world. We moved our camera 30 units, so in world space, the camera is now located at {0, 0, 30}. In object space, however, the camera is still located at {0,0,0}.
Spaces matter when transforming an object. Transformations need to be applied to the right node to get the result you want. If you apply a rotation in object space, the object rotates around its own origin. If you apply a rotation in world space (which you could do by transforming the root node, for example), the object would orbit around the world's origin. It's also possible to apply a rotation to one object in another object's space, and that's what happens with scene inheritance.
When an object inherits a transformation from a parent or other ancestor in the scene graph, that transformation happens in the ancestor's object space, not the in the child's. If that's confusing, a small code example may make it clear.
Let's add a child to the torus and see how the torus' rotation affects the child. That should help you understand how node inheritance affects object transformations. Let's create a text object. I'm choosing text because traditionally, programmatically creating 3D text is kind of hard, and SceneKit makes it extremely easy.
Before we add any code, we need to make one change to the existing code. We need to move the camera back a little further so we'll be able to see the child object as it rotates with the parent. Change this line of code:
cameraNode.position = SCNVector3Make(0, 0, 30);to this:
cameraNode.position = SCNVector3Make(0, 0, 50);Now, add the following code to create a text object as a child of the torus rather than a child of the root node:
// Give the Torus a child
SCNText *text = ;
SCNNode *textNode = ;
textNode.position = SCNVector3Make(-1, 5, 0);
textNode.transform = CATransform3DScale(textNode.transform, .1f, .1f, .1f);
;Run this now and you'll see that the text object rotates, but it orbits the parent rather than rotating around its own center. That's because the rotation is happening in its parent's space.
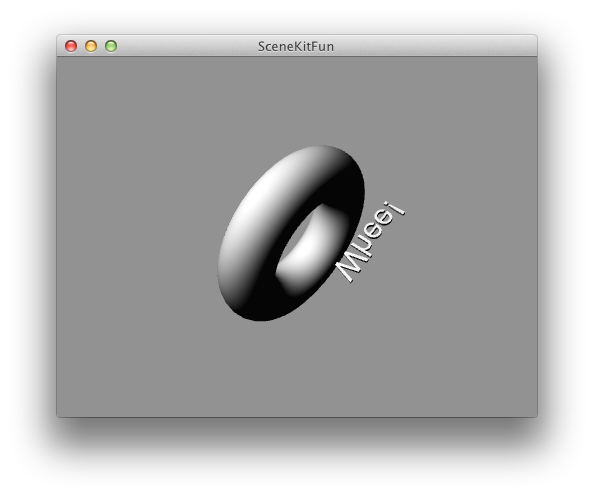
Just because the node inherits transformations from the parent doesn't prevent it from being transformed on its own. We could, for example, also rotate the text in its own local space, like so:
// Animate the text
CAKeyframeAnimation *textAnimation = ;
textAnimation.values = ;
textAnimation.duration = 3.f;
textAnimation.repeatCount = HUGE_VALF;
;With that code added, the text will orbit around the parent and also rotate around its own origin.
Parenting is an extremely important and and powerful concept. It allows you to combine multiple objects that behave as components of a whole. Each object is capable of moving independent of its parent, but also inherits the movements of the parents. Without this structure, complex skeletal animation would be all but impossible. Think about this: when you move your upper arm, your lower arm, hand, and fingers all go along for the ride. In 3D terms, your lower arm and fingers inherit the transformations of your upper arm in your upper arm's object space. But, you can still bend your lower arm and fingers independently, however. In 3D terms, the lower arm and fingers would be transforming in their own object space in addition to inheriting the parent's transformation.
Materials
If you've ever worked with a 3D program, you're probably aware that most of them have extensive options for defining how an object looks. They allow creating "materials" using images, colors, and procedural textures to define not just the diffuse qualities of the object's surface, but also to define the specular, transparency, reflective, and emissive components (emissive components are used to simulate materials that emit light, like LED displays). These programs also allow you to affect the opacity of an object and to use something called a normal map to give the material greater detail than allowed by the number of vertices in the underlying object.SceneKit has a lot of this same material functionality built right into it. It doesn't have the ability to define procedural textures because those tend to be computationally expensive and SceneKit is primarily designed as a realtime display technology. SceneKit does have the ability to use either images or flat colors to define several different properties of a material.
To create a material, you create an instance of SCNMaterial and set some properties on it. Let's start with a simple example. We'll create a shiny plastic material for our torus. Add the following code to awakeFromNib to do that:
// Give the Torus a shiny blue material
SCNMaterial *material = ;
material.diffuse.contents = ;
material.specular.contents = ;
material.shininess = 1.0;
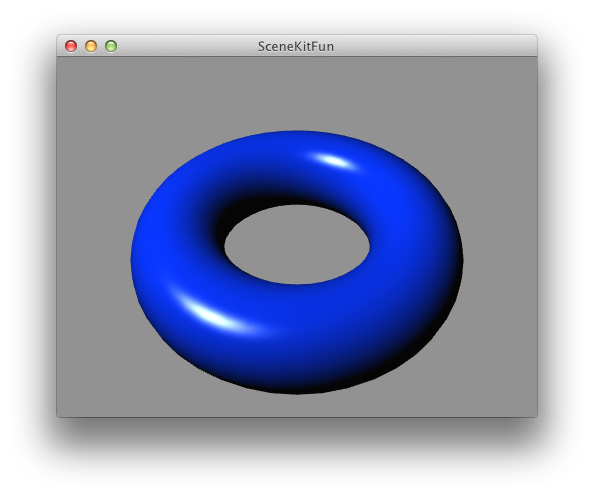
torus.materials = @;If you run the app now, you'll get a blue torus with a white hotspot rather than the flat gray torus we had before. Since we defined a blue diffuse and a white specular, gave the material some shininess, and have a direct light in our scene, we get this blue plastic look:
Instead of assigning colors to the diffuse and specular contents, we could also assign images. SceneKit will automatically map the image to the surface based on the UV values of the object's geometry. UVs, which define how an image maps onto a 3D object, are created automatically for SceneKit primitives and will be imported for objects created in an external 3D program.
Let's use an image for our diffuse value instead of a flat color. We'll leave the specular component defines as a simple color (white). I created this simple image in Photoshop using the Add Noise filter. You can download it or you can use any other image you want for the next code example.

Once you've added the image to your project, replace the existing blue material code with the following version:
// Give the Torus an image-based diffuse
SCNMaterial *material = ;
NSImage *diffuseImage = ;
material.diffuse.contents = diffuseImage;
material.specular.contents = ;
material.shininess = 1.0;
torus.materials = @;The new version will look like this (assuming you've used the same image):
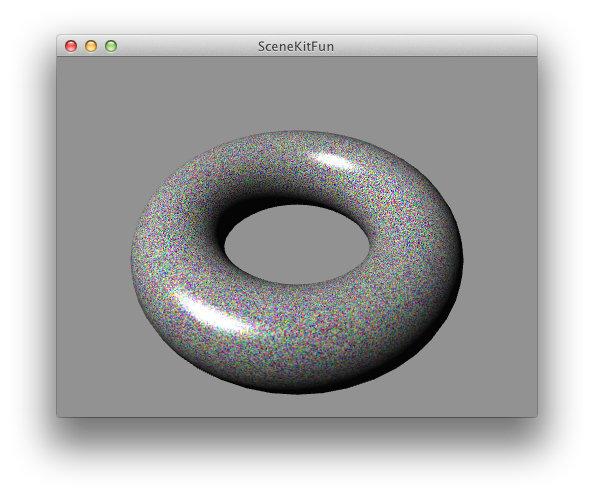
All of the material properties that are defined as an SCNMaterialProperty can be set to use either an image or a color. There are also a number of properties on the SCNMaterialProperty that can be set to modify how the material is drawn. These will look familiar to anyone who has worked with OpenGL textures before.
For example, we could tell SceneKit to use trilinear filter for scaling the image. This will improve the appearance of the texture when SceneKit has to increased or decrease the texture's size:
material.diffuse.minificationFilter = SCNLinearFiltering;
material.diffuse.magnificationFilter = SCNLinearFiltering;
material.diffuse.mipFilter = SCNLinearFiltering;
You won't notice much difference in our current app if you add this code, but it's worth changing to a trilinear filter if you're using an image-based material. There is a tiny bit of additional overhead associated with doing this, but it will make images look much better when they are scaled up or down when mapped to an object. Note, you have to specify properties for each material independently.
Let's play around with a little more cool stuff in the materials settings.
Normal Maps
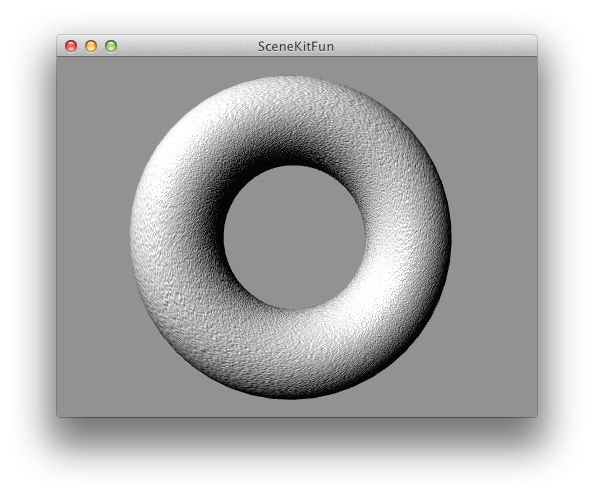
Normal mapping is a really cool way to make models look better without increasing their vertex count, which is a really good thing for real-time graphics where performance considerations really matter. Normal maps are typically generated out of a 3D program using a higher resolution version of the model you're displaying. Basically, a normal map uses the pixels of an image to store normal data from the higher resolution object. Normals, as you may recall, are used for doing lighting calculations. Normal maps allow a low resolution model to use the normal data from a higher resolution image in their lighting calculations, so they render as if they were much more complex models than they actually are. Because modern graphics hardware has efficient, accelerated methods for dealing with bitmap image data, this normal information can be fed to the shaders with a fairly nominal amount of overhead compared with increasing the vertex count.That may sound like gibberish, but it'll make more sense in a moment. I've created another image. This is a normal map based on that noise image we used earlier for the diffuse texture. If you want to create your own normal maps, be aware that there are multiple types of normal maps. Make sure you're creating a tangent space normal map for SceneKit (if it's purple, it's probably correct). This is the default in most 3D packages. You can download my normal map here:

This particular normal map defines the normals of a rough, craggy surface. Creating this surface in geometry would require an extraordinarily high vertex count. We use this image exactly the same way we used the diffuse image earlier, except we assign it to the normal property rather than the diffuse:
NSImage *normalImage = ;
material.normal.contents = normalImage;That will give us a torus that no longer has a nice smooth surface, but instead looks like it's very rough. (I've removed the diffuse texture to make the effect easier to see in the following screenshot):
But, wait! There's more.
Transparency
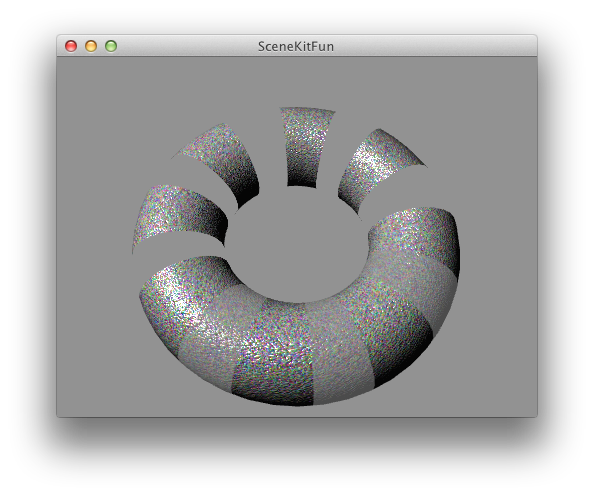
We can also use an image to control which parts of an object are fully transparent, which are partially transparent, and which are opaque. Here's an image I created that has black and white stripes. The black strips have an alpha value of 1.0 (fully opaque), the gray stripes have an alpha value of 0.5 (partially transparent), and the white stripes have an alpha of 0.0 (fully transparent). Note, SceneKit will use the alpha component of each pixel and not the saturation (how dark the pixel is), I just made the transparent ones white and the opaque ones black so it would be easier to see what was going on.
If we assign this image to the material's transparent property, this image will then control which parts of the image are opaque or transparent. That code would look like this:
NSImage *opacityImage = ;
material.transparent.contents = opacityImage;and the result of that code would be this:
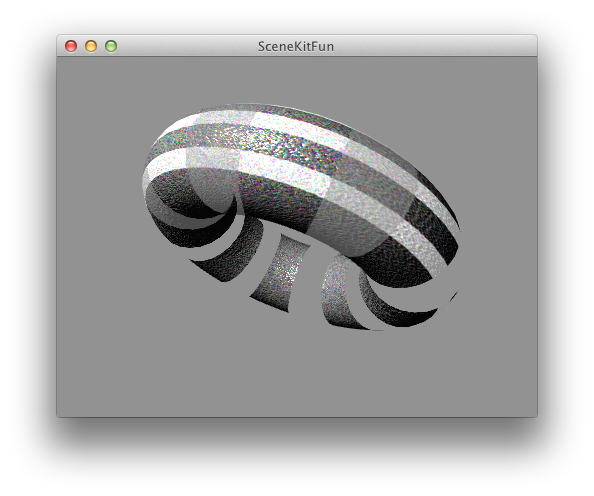
 Similarly, you can also use an image to make parts of a model look like they're emitting light. The light emitted by this property will not affect other objects in the scene, but it can be used to create interesting science-fictioney looking illuminated displays. The process is exactly the same as what we did above.
NSImage *emissionImage = ;
material.emission.contents = emissionImage;The white stripes you see in the following image are areas that are emitting light based on a similar image to the one we used for controlling transparency:
Environment Maps and Reflection
Creating shiny metallic objects can also be done with SceneKit, and it's relatively trivial. The trick to creating reflective objects is having something for the object to reflect. In the real world, shiny metal objects will have the sky and clouds and all the various things around them in the world to reflect back to the viewer's eye. In our virtual world, we usually don't have all that stuff defined, and even if we did, it would be too computationally costly to do physically accurate reflection calculations in real time using modern computers.Instead, we can create something called a "cube map" (or "environment map") which is simply a collection of six images: front, back, left, right, top bottom. These six images define a cube surrounding the viewer. That cube won't (in this case) actually be shown to the user, but it will be use for calculating the reflections off a reflective surface. Calculating reflections from a cube map is much faster than calculating real reflections can be done in real time. If you select a cube map that is appropriate to your scene, the results can be fairly convincing.
You can find tutorials for creating cube maps using photographs or by generating them from a 3D program and there are many license-free cube maps available if you search the internet. For simplicity, I'm using the environment map taken from Apple's SceneKit Material Editor sample code in this example.
To create a cube map with SceneKit, we simply build an NSArray containing the six images in the following order: right, left, top, bottom, back front. Once you have the cube map array, simply assign it to the contents of the material's reflective property, and you're done. Here's how to create a shiny metallic material this way:
// Give the Torus a metallic surface
SCNMaterial *material = ;
material.diffuse.contents = ;
NSArray *mapArray = @;
material.reflective.contents = mapArray;
material.specular.contents = ;
material.shininess = 100.0;
torus.materials = @;
Run this, and your torus will be metallic looking. The torus is "reflecting" the contents of those six images back to our eye to create the illusion of a metallic surface.
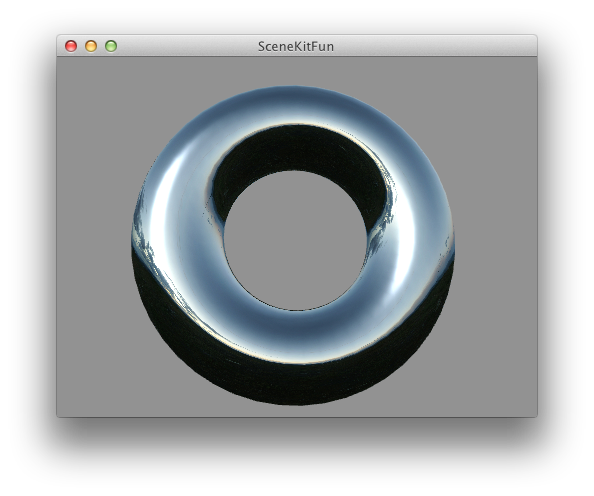
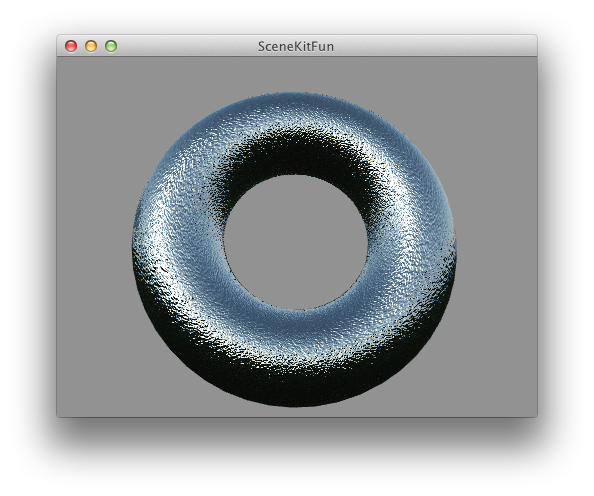
You can combine the different material properties to create all sorts of new appearances. If we combine the reflective material with the normal map from earlier, for example, we'd get something like this:
Hit Testing
One of the common problems in 3D graphics is determining if a mouse click or tap is on a specific 3D object. To do this, you have to project an imaginary line (a vector) into the 3D world using the camera's projection matrix (the projection matrix is used to calculate how the world is displayed in two dimensions) and then do collision detection with the various objects in the world. Doing that with good performance is not always trivial. Fortunately, SceneKit does all the heavy lifting for us and it's integrated with NSView's existing hit testing mechanism.Let's figure out if a click is on the torus. Let's make it even more fun. If there's a click on the torus, let's animate the torus' material so it glows red for a moment. Yes, Virginia, you can use Core Animation to animate material properties too.
Add the following method to XXXSceneView:
- (void)mouseDown:(NSEvent *)event
All we have to do is get and convert to local the mouse down coordinates. Then, we pass that to hitTest:options:, which will return an array of SCNHitTestResult objects ordered based on the their proximity to the active camera. So, the first object in the array, if there are any objects in the array, will be the nearest object underneath the the cursor. If the array is empty, nothing was clicked.
In our case, there is only one object, but the technique would be the same with a more complex scene. We just grab the node from the SCNHitTestResult and have our way with it. In this case, I've animated its material to glow briefly red when it's clicked.
Loading and Using Scenes from Files
That should give you a pretty good idea of the basics of using SceneKit to build and manipulate scenes programmatically. Where SceneKit really shines, however, is when you use it to load more complex scenes created in an external 3D program.Unfortunately, SceneKit only supports one file format - Collada - and there are some limitations in its support of that file format. It appears, for example, to only support a single animation (or "take") per file, and it doesn't support the most recent version of Collada, 1.5. Collada has the ability to support multiple animations in a file, but I haven't been able to get SceneKit to recognize more than one. Apple's own SceneKit Animations sample code uses separate Collada files for each individual animation, so my suspicion is that this is a limitation of SceneKit, though it's not document and there could be something else going on.
SceneKit also seems to be a little picky about the Collada files it will load. Loading scenes with no animations worked fine for me using scenes exported from several different applications, but once I started adding animations, SceneKit got very picky and refused to load files not exported from Maya. From looking at the metadata in the example Collada files included in the SceneKit source code, it appears Apple used Maya to create their own example files. Not only that, used a custom exporter, not the built-in AutoDesk Collada exporter. It does not appear that Apple has made this exporter public, but files with a single animation exported from Maya with the default exporter appear to work okay.
I put together a quick sample file with two animations in Blender. After several attempts at converting using several different techniques (including AutoDesk's free FBX Converter), I finally gave up and settled on a single animation file converted using the 30-day free trial of Maya. It's a rather roundabout way of getting data, so I hope Apple adds support for other file formats. FBX would be great. Despite it being a proprietary format, it seems to have jumped ahead of Collada in terms of update and features.
Anyway, if you want to use my sample Collada file, you can find it here. You can also grab Apple's sample files from their sample code projects. If you're interested in creating your own files, at the moment, I think using Maya is your best bet (Note - I've been getting reports that Cinema4D export with animations works also). If I have time, I'm going to compare the output of Maya and Blender and see if I can't create a custom Collada exporter for Blender that works with SceneKit, but I make no promises that I'll be able to get to that any time soon.
Adding a Collada file to your Xcode project is identical to adding any other resource. Just drag it into your project. If you single-click on the Collada file after it's been added to your project, you'll see that Xcode now has a nifty new editor for Collada files. It's a little crashy as of yet, but it's still very neat. Here's my simple Collada file opened up in Xcode's editor:

Creating a SceneKit scene from a .dae file couldn't be much easier. This is all you have to do:
NSURL *url = ;
NSError * __autoreleasing error;
SCNScene *scene = ;
if (scene)
self.scene = scene;
else
NSLog(@"Yikes! You're going to do real error handling, right?");SceneKit will parse the file for you and create a full scene with nodes for all the objects contained in the file - lights, objects, cameras, etc. It will also play any animations that the file contains if you want it to, if you set the view to play:
self.playing = YES;SceneKit also has built-in mouse handling if you want to let the user rotate the object. If you want to try that, it's just one additional line of code:
self.allowsCameraControl = YES;You can go ahead an manipulate any of the nodes in a loaded scene just as you did with scenes you built programmatically. Want to animate a node? Do it exactly like we did with the torus - build a CAAnimation and assign it to the node. Finding nodes is usually best done by filtering on the node's name. You can find the name of various nodes in the Collada editor in Xcode. If we want to retrieve the Armature node in my sample file, for example, all we have to do is make a note of the name of the node, and retrieve the node like this:
SCNNode *armatureNode = ;SceneKit even creates CAAnimation objects for the animation contained in the Collada file. Be aware, however, that these animations are often complex and may be made up of several nested CAAnimationGroup objects. To get the animations for a node, just do this:
CAAnimation *armatureAnimation = ;Notice that we used the animation name ("Armature-anim") from the editor screenshot to retrieve the animation. That CAAnimation it returns be used just like ones we create ourselves.
Adding the Items from Collada Files to an Existing Scenes
SceneKit also allows you to add individual parts of a Collada file to an existing scene using the SCNSceneSource class. For example, you can pull an animation out of another file and add it to a node in your current scene (at least, assuming the animation you're pulling uses the same armature as the node you're adding it to). Doing that would look like this:SCNNode *armatureNode = ;
NSURL *sceneURL = ;
SCNSceneSource *sceneSource = ;
CAAnimation *animationObject = ;
;
This same technique can be used to combine any elements from any number of different files. So you could, for example, create your initial scene from a file that contains the camera, lights, and static elements, then add other objects from various other files. You could add a player from one file, enemies from another file, and moving obstacles from yet a third file, for example.

